How to Reupholster a Curved Back Chair
Do you have an old chair that you want to reupholster? In this DIY guide, I will share a working guide to reupholstering a chair with a curved back step by step. If you master these skills, you might be able to reupholster many other pieces of furniture so as to extend their lifespan and save more expense on that expensive furniture.
Join us as we unlock the secrets to reviving your beloved curved back chairs and ottomans.
How to Reupholster a Curved Back Chair?
To reupholster a curved back chair, begin by removing the old upholstery fabric, burlap, and batting.
Vacuum and clean the chair with Simple Green and hot water.
Paint the chair frame with General Finishes in Linen and Winter White glaze.
Use heavy weight 10 ounce drop cloth for the main sections of the chair and upholster the back with red toile fabric.
Pay attention to the curved details on the arms and ensure a secure fit.
The chair may have casters with beaded details and wooden wheels that should be preserved.
Follow the steps of removing the old fabric and preparing the chair before upholstering with the new fabric.
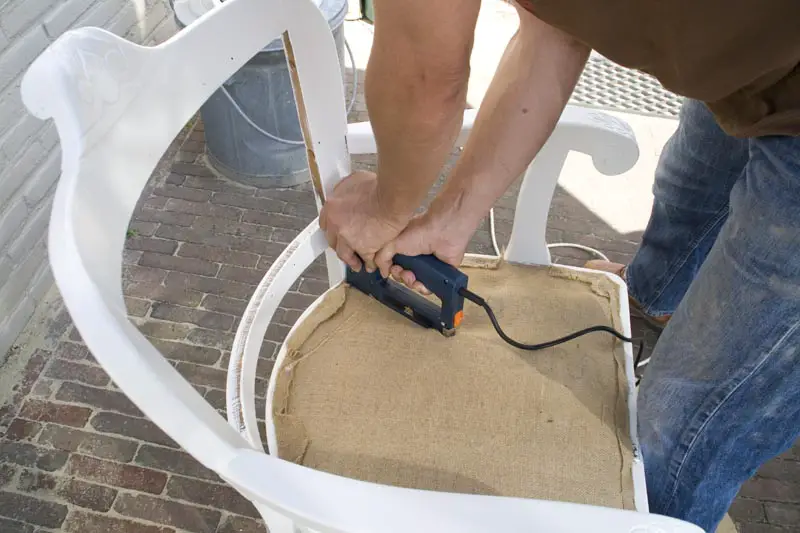
Make sure to staple the fabric straight, using electric staplers for better results.
Finish the edges of the fabric with upholstery tacks, jute rope, or decorative ribbon.
Key Points:
- Remove old upholstery fabric, burlap, and batting.
- Clean chair with Simple Green and hot water.
- Paint chair frame with General Finishes in Linen and Winter White glaze.
- Upholster main sections with heavy weight drop cloth, and back with red toile fabric.
- Pay attention to curved details on arms for secure fit.
- Preserve any casters with beaded details and wooden wheels on chair.
Check this out:
💡 Did You Know?
1. Did you know that reupholstering a curved back chair is more complicated than it seems? It requires specialized techniques and materials to properly shape and attach the fabric to the curved frame.
2. Many people may not know that the famous Chesterfield sofa, known for its distinctive button-tufting and curved back, was originally designed in the 18th century for Lord Philip Stanhope, the 4th Earl of Chesterfield.
3. The curved design of the backrest in chairs can provide ergonomic benefits as it supports the natural curvature of the spine, promoting better posture and reducing the risk of back pain.
4. One interesting fact about reupholstering a curved back chair is that the fabric pattern must be carefully aligned to maintain a seamless and aesthetically pleasing look when the chair is completed.
5. The French rococo style, popular in the 18th century, often features ornate and beautifully curved chair backs. Reupholstering chairs in this style requires skilled craftsmanship to preserve the intricacies of the design while updating the fabric.
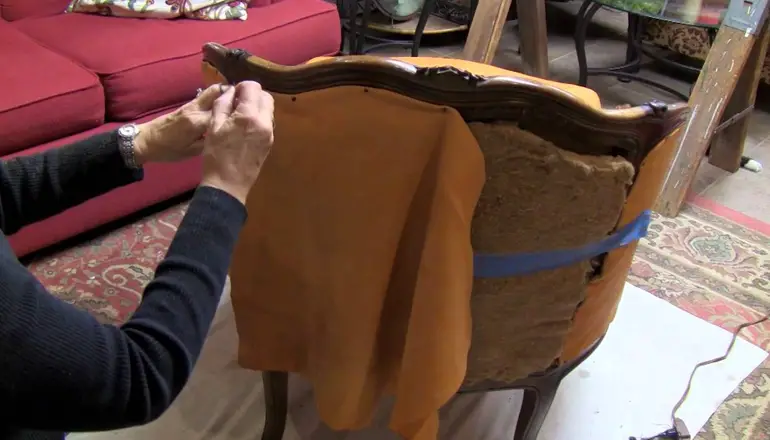
1. Removing The Old Upholstery
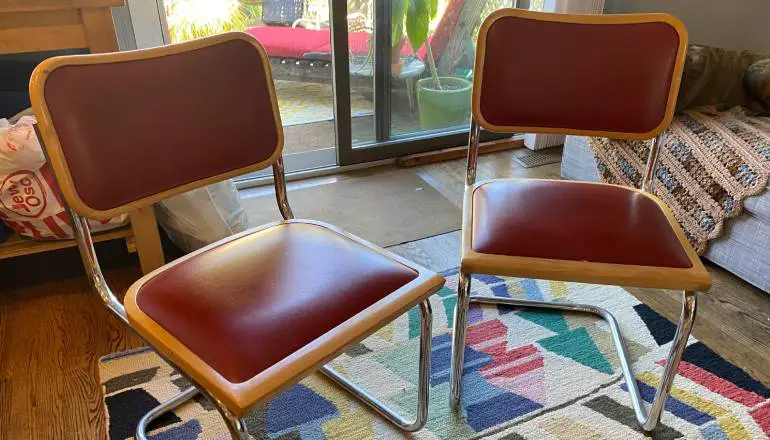
The first step in reupholstering a curved back chair is to remove the old upholstery. In this article, the author shares their personal experience of reupholstering a set of dining chairs that held sentimental value for them. These chairs were originally part of their parents’ dining room set from 1953 and were nearly discarded after their parents’ passing. However, the author decided to save them and give them a new life through reupholstery.
To remove the old upholstery, the author utilized a combination of a screwdriver and pliers to carefully take out upholstery tacks, nails, and staples. They discovered that this process was quite challenging, but fortunately, they came across a specialty upholstery tack remover which greatly facilitated the task. Additionally, the chair had a layer of old fabric, seagrass stuffing, and torn burlap underneath, all of which needed to be fully removed.
Key points:
- Removing the old upholstery is the initial step in reupholstering a curved back chair.
- The author’s personal experience involves preserving a set of dining chairs with sentimental value.
- A screwdriver and pliers were used to remove upholstery tacks, nails, and staples.
- The author found a specialty upholstery tack remover helpful for this challenging process.
- The chair also had layers of old fabric, seagrass stuffing, and torn burlap that needed removal.
“We were determined to give these chairs a new life through reupholstery.”
2. Preparing The Chair Frame
After removing the old upholstery, the author thoroughly cleaned and prepared the chair frame. The chair was vacuumed and cleaned with Simple Green and hot water to remove any dirt or debris. To give it a fresh and updated look, the chair frame was then painted with General Finishes in Linen and Winter White glaze.
The chair in question featured soft curved details on its arms, which added to its unique charm. The author appreciated these details and wanted to maintain and enhance them during the reupholstering process. Additionally, the chair had casters with beaded detail at the top and wooden wheels, further contributing to its aesthetic appeal.
3. Upholstering The Main Sections
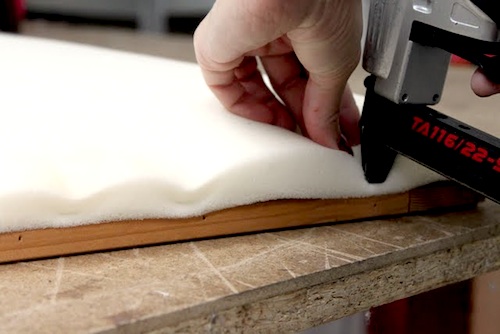
The chair’s main sections were upholstered using heavyweight 10-ounce drop cloth fabric, which is renowned for its durability and suitability for upholstery projects. To ensure a comfortable seat, the author covered the seat springs with a new burlap and attached a thick and dense layer of firm furniture foam.
To upholster the main sections, the author followed these steps:
- Used the old fabric as a template to cut the new fabric.
- Stapled the fabric to the seat cover, folding under the edge and stapling close to the edge for a snug fit.
- Created pleats to achieve rounded corners.
- Secured the fabric with upholstery tacks, jute rope, or decorative ribbon for a finished look.
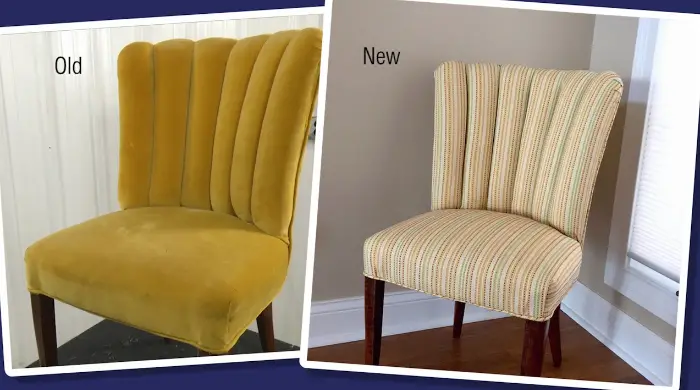
4. Upholstering The Back Of The Chair
The author added a unique touch to the back of the chair by upholstering it with red toile fabric, which instantly added a pop of color and visual interest. Upholstering the back of a curved chair requires special attention in order to ensure that the fabric follows the natural curve of the chair.
The process began by cutting the red toile fabric to fit the measurements of the old fabric. The fabric was then carefully stapled to the back of the chair, ensuring it was straight and perfectly aligned with the chair’s curve. To give it a polished and refined look, the edges of the fabric were finished using upholstery tacks, jute rope, or decorative ribbon.
5. Finishing Touches And Details
To tie together the reupholstered chair and ottoman (which were mentioned briefly in the article), the author used drop cloth fabric, red toile fabric, and jute trim. This allowed for a cohesive and coordinated appearance between the two pieces, despite their mismatched legs.
The article also mentioned the wood carvings on the legs of the ottoman and the curved detail on the front, adding to the overall aesthetic appeal of the set. Although the process of reupholstering the chair and ottoman took some time, the author emphasized that the end result was definitely worth the effort.
- The author used drop cloth fabric, red toile fabric, and jute trim to tie together the chair and ottoman.
- The wood carvings on the legs and the curved detail on the front enhance the set’s aesthetic appeal.
- Reupholstering the chair and ottoman was a time-consuming process, but the end result was worth it.
6. Personal Account And Conclusion
In this article, the author shares their personal account of reupholstering a set of dining chairs with curved backs. They explain the sentimental attachment they had to these chairs, which motivated them to save and transform them rather than discarding them.
Throughout the article, the author provides a step-by-step guide on how to reupholster a curved back chair, covering aspects such as:
- Removing the old upholstery
- Preparing the chair frame
- Upholstering the main sections
- Upholstering the back of the chair
- Adding finishing touches and details
The article ends with an invitation for readers to follow the author on social media and engage in a conversation about the reupholstered chair. It is evident that the author takes great pride in their craftsmanship and is eager to share their experience with others.
This article serves as a comprehensive guide for individuals interested in reupholstering a curved back chair, providing insights, tips, and personal experiences to assist them throughout the process.
FAQ
What is a chair with a rounded back called?
A chair with a rounded back is commonly known as a barrel chair. This unique design not only offers superior relaxation but also adds a touch of sophistication to any space.
How to make a round bar stool seat cover?
To make a round bar stool seat cover, start by measuring your bar stools and creating a freezer paper template. Use a ruler to mark the freezer paper from the center point, ensuring an accurate measurement. Cut out the template and double-check that it matches the stool’s diameter plus 3 inches.
Next, iron the shiny side of the freezer paper to your chosen fabric and cut it accordingly. Finally, peel away the freezer paper template, revealing your custom-made round bar stool seat cover ready for use.
What are the best techniques and materials for reupholstering a curved back chair to ensure a professional and long-lasting result?
When reupholstering a curved back chair, there are several techniques and materials that can help achieve a professional and long-lasting result. Firstly, it is important to properly prepare the chair by removing the old fabric and inspecting the frame for any damage or weak spots that need to be reinforced.
For the upholstery itself, using a high-quality and durable fabric is crucial. Fabrics such as linen, cotton, or synthetic blends are often recommended as they are strong and resistant to wear and tear. It is also advisable to choose a fabric with a pattern or texture that can easily accommodate the curved shape of the chair without distorting or looking stretched.
In terms of techniques, one effective method for reupholstering a curved back chair is to sew or staple the fabric with precision. Making sure the fabric is smooth and wrinkle-free is important to achieve a professional finish. Additionally, using dense and high-density foam for padding can provide comfort and help maintain the shape of the chair over time. Employing a combination of tacks, staples, and sturdy adhesive can ensure the fabric stays securely in place.
The key to a professional and long-lasting reupholstering result for a curved back chair lies in the use of high-quality materials, precision sewing or stapling techniques, and attention to detail during the reupholstering process.
Are there any specific challenges or considerations when reupholstering a curved back chair compared to a regular chair, and how can they be overcome?
Yes, reupholstering a curved back chair poses unique challenges compared to a regular chair. The main consideration is the need to maintain the integrity of the curved shape while upholstering. This requires careful manipulation of the fabric to smoothly fit the contours of the chair’s back. Special attention must be given to ensure there are no wrinkles, puckering, or uneven distribution of the fabric.
To overcome these challenges, experienced upholsterers use techniques such as steam stretching and hand stitching. Steam stretching involves using a steamer to heat and soften the fabric, allowing it to be easily manipulated to conform to the curves. Hand stitching is employed to secure the fabric tightly and evenly around the edges of the chair’s back.
Additionally, selecting the right materials that can stretch and conform to the curves without losing their shape over time is crucial. The expertise and attention to detail of the upholsterer play a significant role in successfully reupholstering a curved back chair.
Related posts