How to Fix Bent Recliner Mechanism? DIY Like a Pro
Tired after a long day, you sink into your favorite recliner, ready to relax and unwind.
But wait, disaster strikes – the recliner mechanism is bent!
Fear not, for all hope is not lost.
In this guide, we will reveal the secrets of fixing a bent recliner mechanism, ensuring your comfort is restored in no time.
Delve into the realm of power connections, touch buttons, and transformer plugs, as we embark on a journey to revive your beloved recliner.
Get ready to recline and discover the steps to recliner rejuvenation!
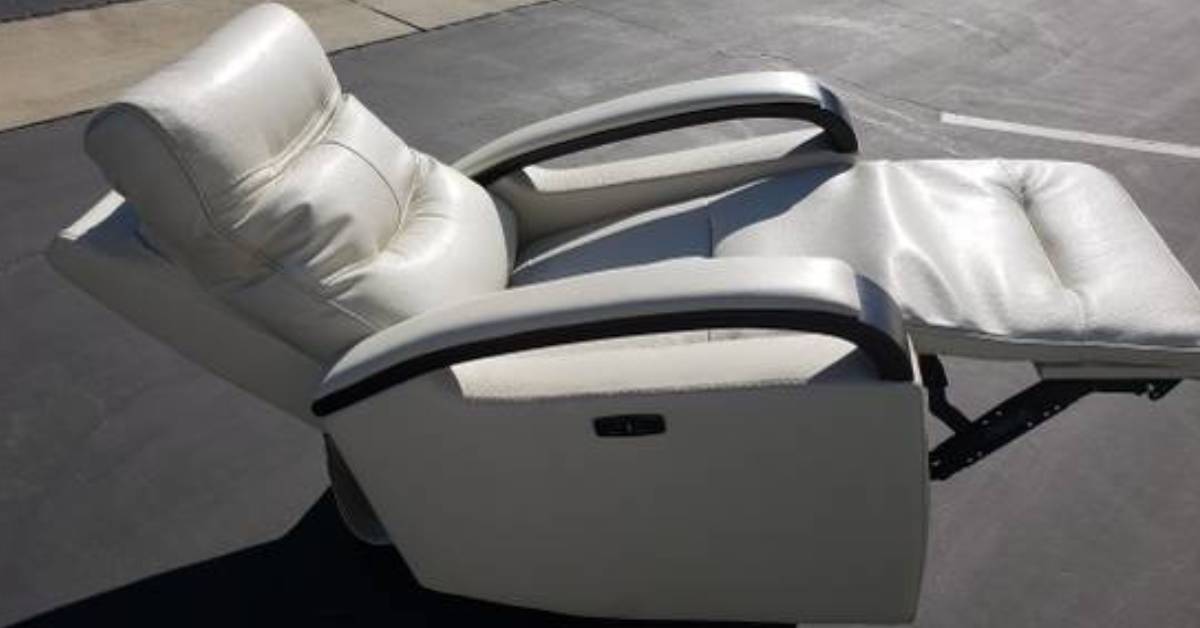
how to fix bent recliner mechanism
To fix a bent recliner mechanism, the first step is to check the power connections and ensure that no wires are caught in the moving parts.
Next, to reset the touch buttons, unplug the DIN plug and wait for 10 to 20 seconds before plugging it back in.
If necessary, the touch junction (switch control) can be replaced by disconnecting the power source, cutting zip ties, and attaching a new one.
Similarly, the transformer plug can be replaced by disconnecting the power source, disconnecting the cord from the motor, and attaching a new transformer plug.
Finally, to replace the power motor (actuator), disconnect the power source, unplug the power cord, unplug the DIN plug, remove the clevis and rue, and remove the power motor.
Reinstall the motor using the clevis and rue to attach it to the mounting bracket.
Key Points:
- Check power connections and ensure no wires are caught in moving parts
- Reset touch buttons by unplugging and waiting before plugging back in
- Replace touch junction by disconnecting power source, cutting zip ties, and attaching new one
- Replace transformer plug by disconnecting power source, cord from motor, and attaching new plug
- Replace power motor by disconnecting power source, unplugging cord and DIN plug, removing clevis and rue, and removing motor
- Reinstall motor using clevis and rue to attach it to mounting bracket
Check this out:
💡 Did You Know?
1. The first recliner was invented by a Frenchman named François-Régis Dudouet in the late 18th century. It was initially called the “Camp Chair” and became popular among French army officers.
2. The mechanism inside most recliners that enables it to recline is known as a “pawl and ratchet” system. This consists of a series of teeth that lock together when the recliner is in an upright position. When the lever is pulled, the teeth disengage, allowing the chair to recline.
3. If the recliner mechanism becomes bent or misaligned, a common fix involves removing the backrest and accessing the reclining mechanism from inside. By carefully realigning the components and securing them properly, the recliner can be restored to its original functionality.
4. To avoid making the recliner mechanism bend or break, it’s important to distribute weight evenly when sitting and getting up from the chair. Placing excessive force on one side of the recliner can strain the mechanism and cause it to malfunction over time.
5. In some cases, a bent recliner mechanism may require professional repair. If attempting to fix it yourself seems daunting or risky, it’s best to consult a qualified technician who specializes in recliner repairs. They will have the necessary expertise and tools to rectify the issue without causing further damage.
1. Checking Power Connections And Looking For Obstructions
Before diving into more invasive repair methods, it’s essential to check the power connections and ensure there are no obstructions affecting the functionality of your recliner. The first step is to verify that the power cord is securely connected to a functioning power outlet. Additionally, examine the entire length of the power cord to ensure there are no visible signs of damage.
Next, inspect the recliner for any wires that may be caught in the moving parts. Gently maneuver the recliner mechanism to check for any obstructions or tangled wires. If you find any, carefully free them from the entangled area, ensuring that all wires are in their proper place and are not at risk of being damaged by the recliner’s movement.
2. Resetting The Touch Buttons
If your touch button power recliner is still not functioning properly after checking the connections and removing any obstructions, resetting the touch buttons may solve the issue.
To reset the touch buttons:
- Unplug the DIN plug from its socket.
- Wait for approximately 10 to 20 seconds.
- Plug the DIN plug back in.
- Test the touch buttons to see if the issue has been resolved.
This simple reset can potentially fix any glitches or errors that were causing the recliner to malfunction.
“A simple reset of the touch buttons can often solve issues with a malfunctioning touch button power recliner.”
3. Replacing The Touch Junction (Switch Control)
If resetting the touch buttons does not yield any positive results, you might need to replace the touch junction, also known as the switch control.
Here are the steps to follow for replacing the touch junction:
- Disconnect the power source to ensure your safety during the replacement process.
- Locate the zip ties that secure the touch junction in place and carefully snip them using wire cutters.
- Once the old touch junction is detached, connect the newly purchased replacement switch control by following the manufacturer’s instructions.
- Secure the new touch junction using zip ties or any provided fastening mechanisms.
- Restore the power source and test the recliner to ensure its proper functioning.
Remember to always prioritize your safety when working with electrical components.
Note: If you are unsure about any step mentioned above, it is recommended to consult a professional.
4. Replacing The Transformer Plug
If your recliner’s transformer plug has become damaged or malfunctioning, replacing it may be necessary. As with previous steps, ensure that the power source is disconnected to avoid any accidents. Locate the cord connecting the transformer plug to the motor and disconnect it.
Now, it’s time to attach the new transformer plug. Follow the manufacturer’s instructions to connect the cord to the motor securely. Once the connection is complete, restore the power source and test the recliner to ascertain its proper functioning. This replacement process should solve any issues related to a faulty transformer plug.
5. Replacing The Power Motor (Actuator)
If none of the previous steps have resolved the issue, it may be necessary to replace the power motor, also known as the actuator.
To do this, follow these steps:
- Disconnect the power source to ensure your safety throughout the repair process.
- Unplug the power cord from the motor.
- Disconnect the DIN plug.
Next, you need to remove the clevis and rue. These are parts that connect the recliner’s mechanism to the mounting bracket. Be careful while doing this to avoid damaging any surrounding elements. Once the clevis and rue are detached, carefully pull out the power motor from its position.
To complete the repair:
- Install the new power motor by reversing the steps described earlier.
- Place the new power motor into its designated spot.
- Gradually reattach the clevis and rue, ensuring they are securely fastened.
- Finally, reconnect the power cord and the DIN plug.
Once you have completed these steps, test the recliner to confirm that the new power motor has resolved the issue.
- Disconnect the power source
- Unplug the power cord from the motor
- Disconnect the DIN plug
- Remove the clevis and rue
- Carefully pull out the power motor
- Install the new power motor
- Place the new power motor into its designated spot
- Gradually reattach the clevis and rue
- Ensure they are securely fastened
- Reconnect the power cord and the DIN plug
- Test the recliner to confirm the issue is resolved.
6. Disconnecting The Power Source
Prior to conducting any repairs that involve electrical components, it is vital to disconnect the power source. Doing so eliminates the risk of electric shock or damage to the recliner or surrounding objects. Always remember to prioritize safety and take the necessary precautions before beginning any repair work.
- Disconnect the power source before repairing electrical components.
- Ensure safety by avoiding electric shock or damage.
- Prioritize precautions to prevent accidents.
“Safety should always be the top priority when dealing with electrical repairs.”
7. Removing The Clevis And Rue
The clevis and rue are crucial parts that connect the recliner mechanism to the mounting bracket. When replacing the power motor, it’s essential to remove these components carefully. Take your time to ensure no damage occurs during their removal, allowing for a smooth and successful repair process.
8. Reinstalling The Power Motor
After successfully replacing the power motor, the final step in restoring your recliner’s functionality is reinstalling the new motor. Begin by meticulously following the reverse process of removing the power motor detailed in step five. Carefully attach the new power motor, securing it with the clevis and rue to the mounting bracket. Take your time to ensure a proper and secure installation.
By following these expert tips and step-by-step instructions provided in this article, you will be able to efficiently fix a bent recliner mechanism. Remember to prioritize your safety throughout the repair process and seek professional assistance if needed.
Once the repairs are complete, you can once again enjoy the comfort and relaxation provided by your power recliner.
- Step 1: Successfully replace the power motor.
- Step 2: Reinstall the new motor following the reverse process.
- Step 3: Carefully attach the new motor using the clevis and rue, securing it to the mounting bracket.
“Take your time to ensure a proper and secure installation.”
FAQ
Can a manual recliner be repaired?
Yes, manual recliners can indeed be repaired. Despite their overall durability, occasional breakdowns can occur over time. Thankfully, the majority of issues with recliner chair actions can be fixed. Whether it’s a faulty mechanism or a broken part, a skilled technician can identify and rectify the problem. With their expertise, they can ensure that your manual recliner is restored to its functional glory, allowing you to once again enjoy the comfort and relaxation it offers. Don’t fret if your manual recliner is giving you trouble – seek the assistance of a professional, and you’ll likely find that a simple repair can extend the lifespan of your beloved chair.
Can recliner chairs be repaired?
Recliner chairs can indeed be repaired regardless of whether they are electric or manual. Our skilled technicians specialize in fixing broken, bent, or malfunctioning recliner mechanisms. With their expertise and readily available common parts, they can likely restore your recliner chair to its fully functional state promptly and efficiently.
What to do when recliner stops working?
If your recliner suddenly stops working, the first step is to ensure safety by disconnecting the power source. After this, inspect the chair by flipping it on its side and examining the cord connected to the motor. If there seems to be an issue with the transformer plug, you can replace it with a new one that you have purchased. Once the new transformer plug is attached to the cord, plug it back into the power source and place your chair in the upright position. Finally, test your recliner to ensure it is functioning properly.
What is the most common problem with recliners?
The most common problem with recliners is the wear and tear of the mechanical components, such as springs or hinges, which can lead to annoying squeaking or creaking noises. Over time, the repeated use and movement of the chair can cause the parts to lose their lubrication or become misaligned, resulting in the dreaded sounds that can disturb your peaceful moments of relaxation. Regular maintenance and inspections can help prevent or address this issue, ensuring your recliner remains a squeak-free oasis of comfort.
Related posts